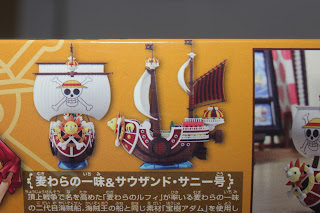
They have a huge collection of toys, and some model kits too. I personally like the Going Merry, but sadly, they had no stock so I went for the Thousand Sunny instead. Something about creating and building things make me so happy, so when I see one of these, I got excited. With stuff like these, waiting for the results of the board exam should be easy.
 |
| The Box. |
 |
For the small pieces of stickers, using some tweezers can help in position. But be careful, the tweezer can damage the sticker. The tweezers I used were for electronic purposes, so the edges are not that smooth.
But this post doesn't finish here! Being the DIY-guy that I am, I tried to match the model kit into some of the available reference photos. Now, the first, and what I think is the most obvious thing that I had to do was to paint the Yards. The yards and the sail came from the same mold, so they were both white. Check this photo from Irving Blake to know what the parts of the ships are.
Not only that, but some minor parts of the ship also needed some retouching. If you look at the letter U shape at the side of the ship, the reference photos that came with this kit (and with the anime as well) those buttons are supposed to be cannons and as such, and must be gray at the tip.
I had no available acrylic paint, the only paint I had though were watercolor paint. I had to improvise because, watercolor paint, won't stick to plastic. So I primed it with white latex paint, as you will see in these pictures.
 |  |
 |
LOOK!
BEFORE
 |
AFTER
 |
|
|
After all the priming and matching were done, it's time to make it stand out more, by weathering. I used some black printer ink and diluted it with water. I put the solution into a waterbrush (a regular brush will still work) and just brushed it all over the parts I wanted to have some more depth. I let it sit for a few minutes, then I gently wiped it with tissue paper. This process is called black washing. Make sure to get into those small nooks and crevices for it to really stand out.
 |
| Testing the Black Ink Wash: (Left) Untouched, (Right) Washed |
I also did the rails and the linings in between the wood. For the wood, I just gently squeezed the waterbrush and let the ink flow in between them, making an outline.
That was it! And here are some more photos of this beautiful beast.
Cheers!~


No comments:
Post a Comment